Showing posts with label Website Development. Show all posts

Thursday, September 27, 2018

How to display Next Item and Previous Items in OSCLASS Classified websites?

How to display Next Item and Previous Items in OSCLASS Classified websites
 
If you are running a classified website using OSCLASS CMS with some of the default themes available, you might have noticed that there is not NEXT and PREVIOUS links when an item is viewed. So, the visitor will have to either go back to home or click on related listings, tags etc. if available to view other listings. The NEXT and PREVIOUS links are desired on the item page. 

If you are running an OSCLASS website, and would like to add NEXT and PREVIOUS item links, we shall see how to add in this post.
Read more »

Monday, October 30, 2017

Drupal 8 Tips: Display only one image from multifield image on teaser

drupal8_display_one_image_multi_image_upload_views

On Drupal 8, there is a useful feature in Views Module (now in Core) settings called "Multiple field settings" with which we can  display only one image from multifield image on teaser. As seen in the image above, each of the content has multiple images but only one is displayed in the teasers.
Read more »

Sunday, September 3, 2017

How to fix partially encrypted/mixed content errors after switching from HTTP to HTTPs (SSL)?

connection is not secure https mixed content

How to fix partially encrypted/mixed content errors after switching from HTTP to HTTPs (SSL)?

HTTP (or Hyper Text Transfer Protocol) is the protocol or method used by which data is moved around the Web but HTTP is not secure. HTTPS (or Hyper Text Transfer Protocol Secure) is the answer to the data protection issue. It used to be mostly used by eCommerce and banking related sites. HTTPS protects data by encrypting it before sending it either way by using an SSL (Secure Sockets Layer) Certificate.  Most websites still run on HTTP which is alright if there is not critical information being transferred such as login, password, bank details etc. But when details such as those mentioned are involved in the transfer, HTTP is not secure as there are ways and means by which bad guys can intercept and misuse. But even after applying HTTPS, browsers may block some contents because they are still being served over HTTP. In this post, we will check how to fix partially encrypted / mixed content errors after switching from HTTP to HTTPS.
Read more »

Friday, June 30, 2017

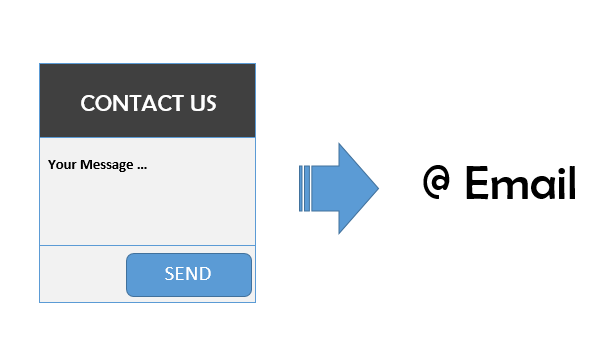
How to receive emails from website using contact forms?

Contact Forms are great to let website visitors contact you for any queries or for specific purpose. Contact Forms are found on most websites nowadays. When we build a website, we usually include a “Contact form" on the website for users to contact us. Once we buy a domain and hosting services from a service provider to host the website, we also usually get email address along with it. And it looks professional to have emails with the website domain name instead of using internet email such as gmail or Yahoo mail. In this post, we shall see how to setup Contact Form and how to receive emails sent from the website.
Read more »

Saturday, June 3, 2017

How to download a website from live server to development local server?

download-move-website-from-live-server-to-local-development-server

In this post, we shall see how to download a website from live server to development local computer. I will be using a Drupal website as an example. On the local machine, I am running XAMPP stack on Windows. But the process would generally be the same for any other CMS or website for that matter. If you are looking for how to move or upload a website from local development computer to a live production server, following the steps here.

Read more »

Thursday, June 1, 2017

How to move website from XAMPP on one computer to XAMPP on another computer?

How to website from XAMPP on one computer to XAMPP on another computer?

I normally use XAMPP for web development on my local Windows machine. And I needed to move the website files from one computer to another as I have a new Windows laptop on which I would be doing my web development activities from now on. So, I needed to move the existing website files from the older computer to the new computer, along with the database of the website. If you are in a similar situation, refer to the steps below how to move the websites from XAMPP on one computer to XAMPP on another computer.


XAMPP is a free and open source cross-platform web server solution stack package developed by Apache Friends, consisting mainly of the Apache HTTP Server, MariaDB database (supports MySQL) , and interpreters for scripts written in the PHP and Perl programming languages.

    X = Cross Platform / Any Operating System
    A = Apache Web Server
    M = MySQL / Maria DB
    P = PHP Programming Language
    P = Perl Programming Language

XAMPP is easy to install and packages all the above requirements of web development out of the box. There is minimal configuration required to kick start web development on local machine instead of installing all the above requirements manually.


How to move websites from XAMPP on one computer to XAMPP on another computer?


Assumptions / Pre-Requisites:

So, I have been using XAMPP for web development on my local computer. I use WordPress and Drupal mostly, but there are some custom PHP sites too. In this post, I will be using one of the WordPress CMS site for the purpose of illustration in this post. On my system, XAMPP is installed at C drive at C:/xampp. Thus, website files are located under C:\xampp\htdocs directory.


For the steps explained below, it is assumed that XAMPP is installed on both the computers already.


Steps to move websites from XAMPP on one computer to XAMPP on another computer.

This method is not only for WordPress shown in this example. It can be used for any other CMS or sites. The basic process in a nutshell is to move the website folder to the new computer under the same folder, that is under C:\xampp\htdocs and move the database to the new computer


1) Move website files from computer 1 to computer 2:

    Copy the website folder you want to move from C:\xampp\htdocs\. For this example, the website folder to be copied is "techblog". Thus, I copied the folder C:\xampp\htdocs\techblog
    Move the website folder from the computer 1 to C:\xampp\htdocs\ on the computer 2 using any medium. For this example, the website folder copied is "techblog". So, we should have the website files in C:\xampp\htdocs\techblog.

That is all that is required as far as moving the website files from one computer to another for using with XAMPP is concerned.


2) Export database of the website from computer 1
  •     Open phpMyAdmin in a browser on computer 1 by accessing http://localhost/phpmyadmin
  •     Login to phpMyAdmin if a password is set for root
  •     Select the  database from the left sidebar of phpMyAdmin
  •     Click on STRUCTURE and check how many tables the database has. It is displayed at the bottom of the STRUCTURE page. Compare  the number of tables during import on computer 2.
  •     Now to export, click on EXPORT tab

        Note: For some CMS (such as Drupal, WordPress etc.) it is recommended to clear cache from the admin interface before exporting database to avoid any import issues and/or site issues after import.

  •     Keep default settings and just click "GO" to export and download the database.
  •     An SQL file will be exported. Save it to computer 1


 3) Import the exported database from computer 1 into computer 2

  •     On computer 2, access http://localhost/phpMyAdmin and login if a password is set.
  •     Once logged in to phpMyAdmin, click on "databases" and create a new database.
  •     You can name the database whatever you want but preferably keep the same name so that settings need not be changed.
  •     Select the new database from the left sidebar
  •     Click Import.
  •     Click on the "Browse" button and locate the database we exported from the old computer.
  •     Keep default settings and just click "GO" to import the database.
  •     Once the database is installed, check the website on computer 2 by accessing http://localhost/techblog. If the database name was kept the same during new database creation on computer 2, there is no need to change database name in the website settings file.

Database import issues?

Unable to import database into phpMyAdmin due to an error?

If this is a new  XAMPP installation on the new computer without any setting changes so far, then the database might not have uploaded due to size limit. In that case, upload size need to be changed in php.ini file on computer 2.


        Error: No data was received to import. Either no file name was submitted, or the file size exceeded the maximum size permitted by your PHP configuration

If you are unable to import database into phpMyAdmin due to the above error, you would need to edit some settings in php.ini configuration file at C:\xampp\php\php.ini.


  •     Open php.ini in a notepad, preferably Notepad++ and edit the values of the following parameters. I increased the following parameters to:

        post_max_size = 50M
        upload_max_filesize =50M
        max_execution_time=200
        max_input_time=200

Since it is a development environment, you can set it to any reasonable value. On live server, these parameters will usually be controlled by your web host service provider. and you may not have access to php.ini.

  •     After changing the values of the above parameters, restart Apache from XAMPP control panel.
  •     Retry the import of SQL database into phpMyAdmin. It should be resolved now.


How to prepare the SQL database file before import if the XAMPP on the previous computer was using another port for such as "localhost:8080" instead of the default "localhost"

If on the previous computer 1, XAMPP was set to use "localhost:8080" instead of "localhost" to access web pages but on the new computer it is using the default "localhost" to access web pages, then the website on computer 2 will not work properly as the database has referenced to "http://localhost:port-number/websitename". Sometimes, people have multiple web servers on a single computer such as IIS and Apache from XAMPP. In that case, the default HTTP port 80 may already be used by the other web server. So, Apache is assigned another port to use.


We can edit the URLs containing the "localhost:8080" from phpMyAdmin with simple SQL querries but I find it easier to edit it using text editors by using simpler "find and replace" feature. We can find all reference of "localhost:8080" and replace them with "localhost" only. For this purpose Notepad++ is good instead of Notepad.

  •     Open the databasename.sql exported from the previous XAMPP in a Notepad or Notepad++
  •     Press CTRL+F and search for "localhost:8080". You should be able to see some results.
  •     Now replace all instances of "localhost:8080" with "localhost" by doing replace all.
  •     Save the edited SQL file or "Save As" with a new name
  •     Use this edited SQL file in the phpMyAdmin import (described above).


Other related posts:

    How to install and run XAMPP on Windows?
    How to migrate site from local development machine to live site?
    How to install and run WordPress using XAMPP on Windows?

Popular computers on Amazon

Tuesday, April 4, 2017

How To Disable Drupal "Create New Account" Link or Tab If Using Profile2 Registration Path ?

how to disable create new account tab in drupal

The default Drupal login page at /user/login shows three tabs - Login, Create New Account and Request Password. Using the tabs, a visitor can either login, create a new account or request password. If visitors cannot create accounts on the Drupal website themselves, then the "Create new account" link or tab can be disabled easily from Drupal administration. But when using Profile2 and Profile2 Registration path, the Drupal default "user/register" path lies redundant. In this post, we shall see how to disable the "Create new account" tab from the default user login page.
Read more »

Monday, March 27, 2017

Drupal Tips - How to redirect user to Drupal frontpage after login

Drupal tips how to redirect user to frontpage after login.png

Drupal usually redirects a user after login to the account information page. But if you would like users to redirect to the Drupal Frontpage after login, the this post is just about that. In this Drupal Tips , we shall discuss how to redirect user to Drupal Frontpage after login. 
Read more »

Sunday, January 22, 2017

How to create sliders in Drupal 7 using Views Slideshow?

How to create sliders in Drupal 7 using Views Slideshow

Sliders or Slideshows are dynamic elements usually displayed in home page of websites. Usually with a catchy background image and phrases, they grab attention. They are great additions to any websites to add more aesthetics to websites. Since they are dynamic, websites look more grand and alive. They can also be used to display important content and graphics to engage with visitors. And though sliders are not so good in terms of making websites easily accessible on mobiles over data network due to higher load times, it has still become a standard web design layout.

In this post we shall discuss how to create testimonial sliders in Drupal 7 using Views Slideshow. Though the usual sliders we see are catchy background images with catchy phrases, sliders are not only meant for images. They can be any thing, almost. We can also display text such as testimonials, images, quotes etc.

Read more »

Friday, January 13, 2017

Drupal: How To Redirect Users to Front Page Based on Different User Role?

Drupal How To Set Different Front Page or Home Page For User Based on Different User Role main

There may be times when we may want to direct users based on their Drupal Roles to different Front Page. For instance, we want users with administrator and content admin roles to see a dashboard, and regular users with "Authenticated User" roles to another dashboard specially designed for those users. In such cases, we want to redirect users based on their roles to different dashboard.

In this post, we shall see how to set different Front Page for users based on their user roles. Page redirection can be easily achieved by using Rules. If you don't want to do it with rules, there are modules available for setting front page for different user roles. We shall be check out two methods to set front page for different user roles - by using Rules Module and another by using "Front Page Module" from Drupal Projects.
Read more »

Thursday, November 3, 2016

OSCLASS Tips : How to move OSCLASS website from live server to localhost development server ?


This post is about how to move OSCLASS website from live server to local development server. The process in a nutshell is pretty forward that is, to download the website files and put them in the local website directory, export database from the live server to the local server and update configuration files on development server. But there are some minute updates or changes required to let OSCLASS work on localhost development server, which we will see in brief in this post.
Read more »

Google Search Consile Error - Submitted URL marked ‘noindex’

Sitemaps are important from SEO perspective. If you have installed the WordPress plugin Google XML Sitemaps , and you have submitted a link ...